Thursday, August 13, 2015

State of the WiP Pile

Hey guys, remember the WiP Name and Shame post I wrote a month ago?  It's the one where I wrote this declaration:

I, Heather of Things I Make. Plus Rocks, do declare that I will finish at least 5 of these projects in the next month, and will not start anything else until they're done.  I will also finish all of these projects before the end of 2015.

WiP Status
BAM!

7 project finished!  SEVEN!!!
2 projects frogged (well, one frogged and a dishcloth thrown in the garbage because I screwed it up so badly it was that or stab repeatedly with my scissors)
Major progress made on my Henri sweater (the purple one on the right) and the fingerless mitts at the top!

You've seen some of the finished projects, like the Fuego in Flames toque, the SpringTastic socks, and the Helix set (my musician cousin won them, btw, and has apparently been bugging his wife for a pair for years).  I'll post about the other finished projects soon!


The grey sweater in the bottom right corner is still waiting on my KAL buddy to catch up - she's currently in the far northern arctic doing field work, so she's forgiven.  I'm not feeling the grey and white baby blanket right now, but I'm not ready to frog it right now either, so it's going into hibernation until I'm desperate for a baby gift.  The dark brown socks are waiting for fall when it's cooler out, and all of the ends in the year in temps scarf in the upper left corner scare the crap outta me, so it's a project for another day.

But hey, I'm pretty darn proud of myself.  Especially since I finished off 4 of them this past weekend (the last before my self-imposed deadline)!  We did a fishing trip to Haines, Alaska, and between 10 hours a driving and a lot of sitting in camp chairs in front of fires and on pretty rock beaches, I got a lot finished.  I'll post more on these another day, but here's some teaser pics!

Haines Fishing Adventure!
Baby vest, finished on the way to Haines - just in time for a wander about the Million Dollar Falls along the way!

Haines Fishing Adventure!
Sewing in ends above the treeline.

Haines Fishing Adventure!
SO MANY ENDS!

fo: 5 Hour (err..Month) Baby Sweater
Sewed in more ends (AAAAHHHH) and then added the buttons I bought at the Dalton City Yarn Store in Haines.

Haines Fishing Adventure!
More end sewing, but this time with a glacier view from a pretty rock beach.

Haines Fishing Adventure!
Of course, we had to run away from these guys at one point.

Haines Fishing Adventure!
MOAR ENDS!  But miraculously, finished in time for a freshly caught salmon dinner, cooked over the campfire!

Haines Fishing Adventure!
And because I obviously hadn't sewn in enough ends, I did some more.


Henri's Bobbles
After all of those ends (SO MANY ENDS OMG), I pulled out my Henri and started the bobble section of the sleeve.  I hate knitting bobbles and that was why I left the sweater alone for so long.

I think I'm on track to finish all of these projects by the end of the year, except maybe that baby blanket, and the scarf will obviously need a couple of days into 2016 - since I'll need to know the temperature on Dec 31 first.

I'm also not letting myself start another sweater until Henri is done.  Following my declaration was tough at times, especially that "not start anything new" part, but it was really good at pushing me to finish projects.  This last declaration, about finishing Henri, is particularly tough because I just received some gorgeous new yarn and I want to play with it so badly!  But I want to wear Henri even more, so it's easy to talk myself out of starting something new.

More on these finished projects soon!

Friday, August 07, 2015

fo: Fuego in Flames Toque

fo: Fuego in Flames Toque
Do you know how hard it is to model a warm toque when your Aster flowers have only just bloomed?  VERY HARD.
Remember when I mentioned this toque (#6) in my WiP Name and Shame post?  It's the Fuego Hat pattern by Justyna Lorkowska, knit out of this scrumptious merino wool/cashmere yarn my best buddy sent me for my birthday last March.  (And I actually finished it a couple of weeks ago, but stalled in taking photos.)  I love both the pattern and this yummy yarn...

...but I don't know if I like them together.

fo: Fuego in Flames Toque
I thought it was a match made in heaven, but in reality, the recommended pattern gauge seems too loose for this yarn, and the beautiful range of colours in this tonal yarn seems to overpower the pattern.  :(

fo: Fuego in Flames Toque
It drapes beautifully though, so it's perfectly slouchy, even when I wear it down over my forehead and ears.  This is the way I always wear toques because I live in a place with Cold Winters and thus necessary, and most slouchy toques tend to not be slouchy when you do that.

fo: Fuego in Flames Toque
Sorry for the crummy photos, guys.  Hats are hard to photograph, especially with a timer only.  I don't know how Michelle does it over and over and over again.  You are a talented woman, my friend.

Here's my Ravelry project page, btw!

Wednesday, August 05, 2015

Yarn Dyeing with Onion Skins

Yarn Dyeing with Onion Skins
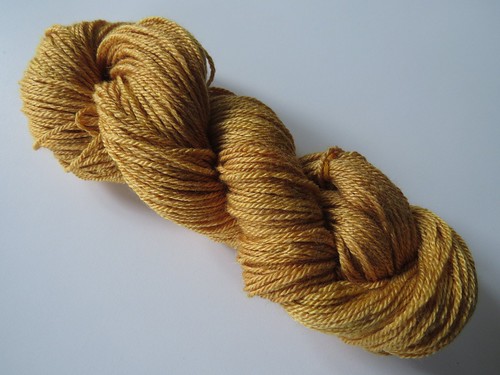
Hey look, I dyed yarn with onion skins!  This is such an easy dyeing experiment and one that a lot of beginners use.  I probably should've started with this before indigo, but oh well!

Yarn Dyeing with Onion Skins
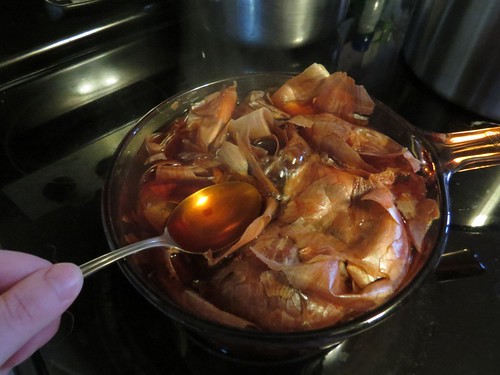
I basically raided the new bag of onions plus all of the older skins that's been collecting at the bottom of our random veggie/fruit bowl for ages, weighed them out for giggles (25 g, btw), then dumped them in my new-to-me glass dye pot, topped it up in water, and simmered all the colour out of it...for hours.  Oops.

I used some undyed Mirasol Yarn Nuna that my LYS owner recced for dyeing.  It's this super soft merino wool/silk/bamboo, and I can't wait to use it up, it's so lovely to touch.  I scoured it with a few other skeins of yarn and did an alum mordent.

Yarn Dyeing with Onion Skins
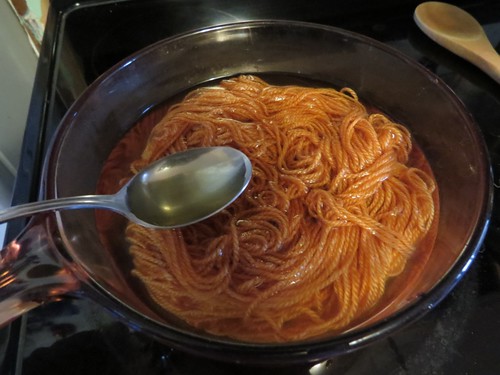
After the dye bath cooled, I added the yarn and warmed it up again to a simmer for a while (sorry, can't remember how long), then let it cool and sit overnight.  By the time I pulled it out of the water, the yarn had absorbed most of the colour!

Yarn Dyeing with Onion Skins
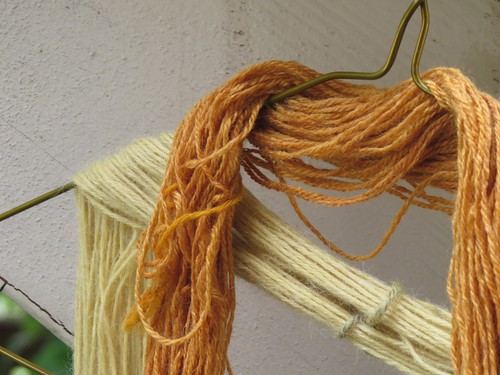
I rinsed the yarn for a while before giving it a vinegar rinse.  After a final mild-soap bath, I pressed out the water and let it dye outside, with another dyed yarn I'll tell you about soon.  :)

Yarn Dyeing with Onion Skins
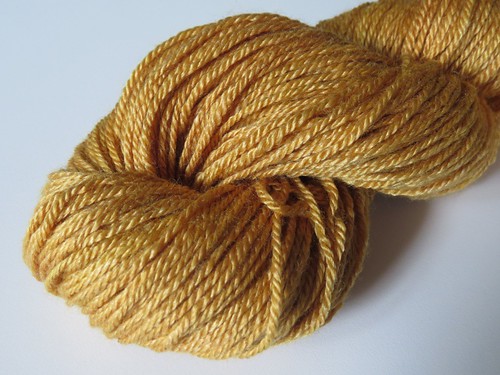
And this was the result!  Orange isn't a colour I gravitate to, but I really love how it turned out.  I even know what I'm going to make with it!


Holla Knits is doing another KAL (several of them actually, but here's one that I'm joining), and I'm going to make up the Francisco Cowl by Allyson Dykhuizen!

Yarn Dyeing with Onion Skins
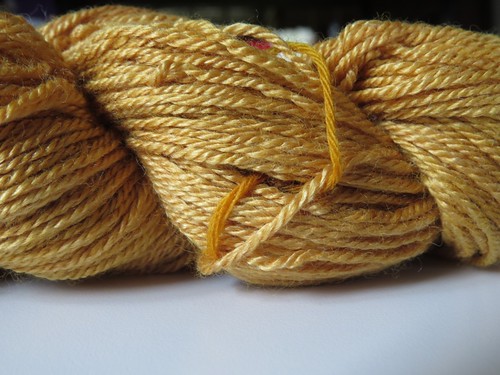
One more note about the onion dye.  Look at how the 100% yarn I used to tie off the skein.  SO ORANGE.  I finally broke and bought a ton of undyed yarn from Knit Picks, and I'm really looking forward to experimenting with it.

*~~*~~*~~*~~*


Guys, I have a ton of posts to write and much less time to write them in now.  I'm not complaining though, since it's because I started a new job last week!  It's a temp position that'll go until the end of the year, but I like the work and, more importantly, it's a job.  Actually, two jobs, because I just found out that I got the distance ed teaching position I applied for at my undergrad university!  WOOHOO.

I'll try to get these posts out soon, because I have something exciting coming up for you all real soon!

Wednesday, July 29, 2015

fo: SpringTastic Socks!

fo: SpringTastic Socks!
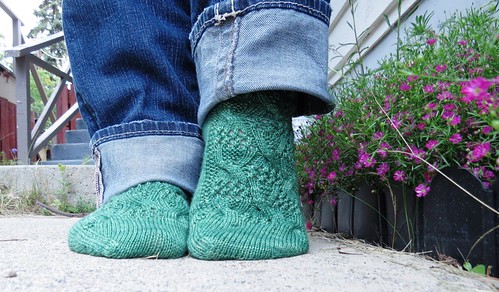
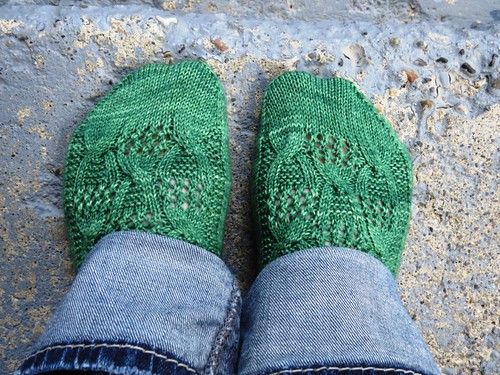
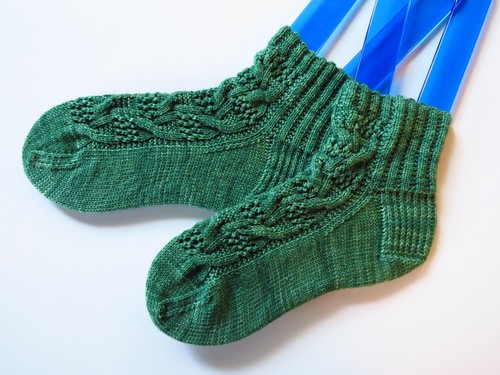
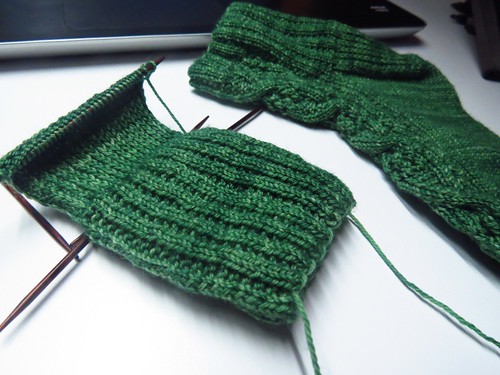
Oh my gosh, they're done!  I feel like I've been working on these forever, but I really only started them in early June, and they spent a lot of down time as I got charmed by other projects.  My declaration to complete some WIPs put them back on the radar, and after finishing the first sock, I whipped off the second sock in 9 days.  A quarter of that was done last night!

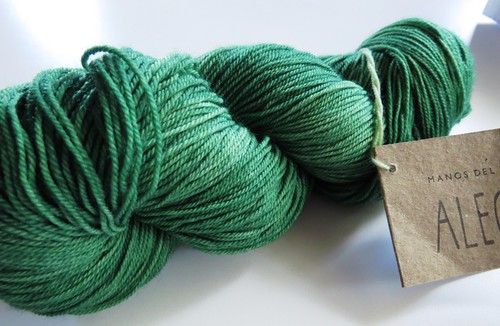
Manos Del Uruguay - Alergria
Pattern: SpringTastic Socks by Stefanie Goodwin-Ritter
Yarn: Manos del Uruguay Alegria
Mods: I started with the 9" sock for the width, but only knit 7" before doing the toe decreases for my size 7 feet.  I reduced the toe length by only knitting 6 decrease repeats (decrease 1 row, k 1 row), then decreasing every row for 6 rows.  I then sewed the toe closed with 28 stitches on the needles instead of 24 to reduce the point for my blunt toes.  The fit is perfect!
Here's my project page on Ravelry.

fo: SpringTastic Socks!
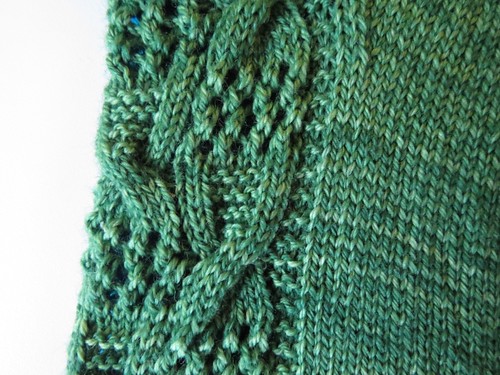
I admit, I didn't really like the cable and lace pattern when I first started it.  It's knit ankle down, so the pattern is upside down as you knit it.  It's not a symmetrical pattern at all, and it looks kind of kooky as you knit it, and I had no idea what the pattern had to do with spring.  But I was committed so kept going.  It was only when I tried them on to check the fit that I understood.

fo: SpringTastic Socks!
It's a basket filled with flowers! 

I was already sold on hand knit socks, but if I weren't these would've done it.  They're so adorable and beyond comfortable!  How have I gone so long wearing ill-fitted socks?  :)

fo: SpringTastic Socks!

Sunday, July 26, 2015

Dyeing Yarn with Black Beans

Yarn Dyeing with Black Beans
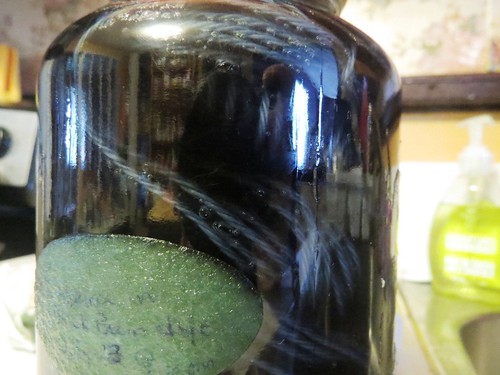
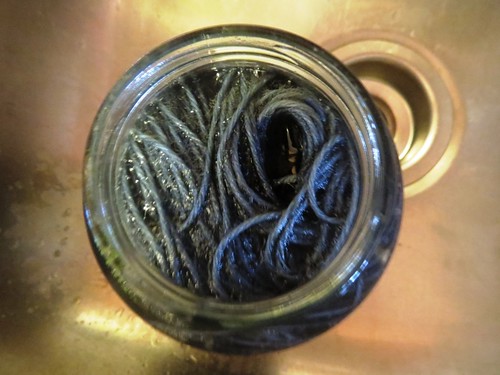
So uh, definitely enjoying the natural dyeing!  I read a few blogs where they'd managed to get blue (apparently a more difficult colour to get with natural dyes) using black beans.  Obviously I had to try!  I dumped a bunch of beans (about 4 cups?) in a bowl with enough water to cover the beans by about 2 inches, then left them alone to steep for 12 hours, stirring often.  It was interesting to watch the liquid change - first turning a light blue, then a deep shade of blue/purple, and eventually almost a deep green-blue.  As others have mentioned, the beans swell up a lot, so you have to make sure there's enough water in there.

Black Bean Dyeing
After straining out the liquid, I left it alone for a couple of hours to let the finer particulates settle out, and then I gently scooped out the liquid into a jar.  Dumped my already scoured and alum mordented yarn into the jar, sealed it up, and left it alone for a while.

And then after 36-ish hours, the liquid seemed to swell a bit, because boy did it start to leak out of my not-so-sealed jar and now I have blue dye all over the open shelves and floor below where I stored it.  That's about when I decided to pulled the out the yarn.

Black Bean Dyeing
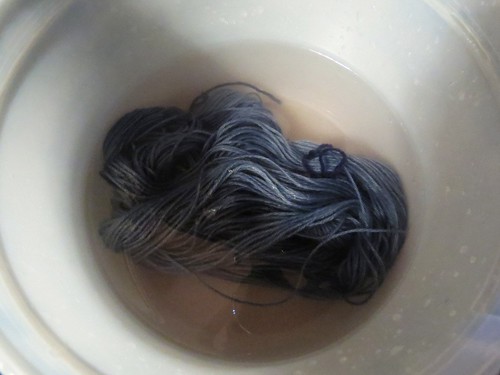
It looked a lot darker when I pulled out the yarn, but a lot of the dye washed out.  It kept shedding dye until I gave it a vinegar bath, which seemed to halt the bleed.  And weirdly, turned the water purple.  I sort of want to play with this dye source some more and see what happens at different pHs.  This blogger got a gorgeous shade of blue GREEN with more acidic well water, which I suspect also had a healthy dose of iron oxide in it too.  (I hope that link works - it did as of yesterday, but it's giving me a hosting error right now).

Yarn Dyeing with Black Beans
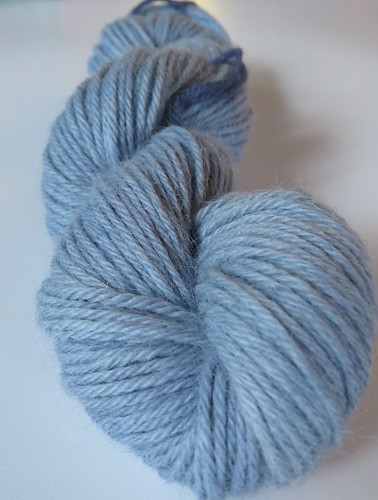
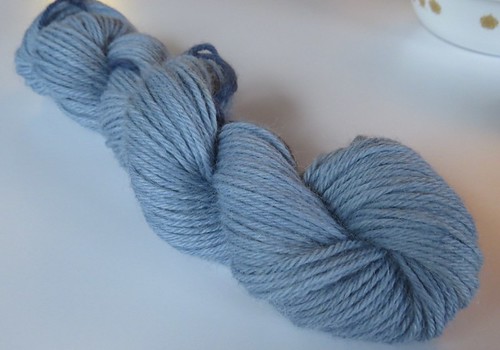
I used a skein of undyed Earth Collection Nova, which is a 100% alpaca in DK weight.  The final result wound up being a gorgeous light shade of silvery blue. 

Yarn Dyeing with Black Beans
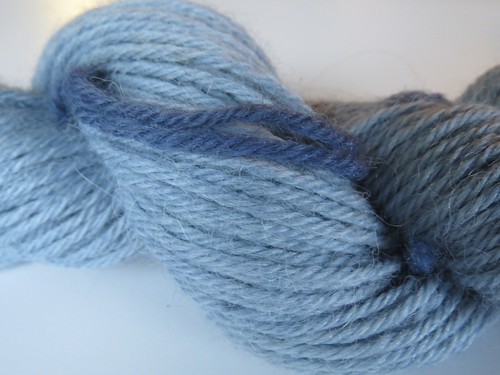
Obviously fibre plays a big roll in dye uptake, since the 100% wool yarn I used to tie off the skein turned a really appealing shade of dark blue.  I definitely want to use wool for this dye bath again!

Black beans...who knew!

Saturday, July 25, 2015

Today was a Creative Day! (and apparently a cleaning day...ick)

I've had a very busy day today.  Besides thoroughly cleaning the snot out of the living room (not literally) and helping the Boyfriend with the rest of the house, I pulled out some yarn sitting in a natural dye pot for the last few days...

Black Bean Dyeing
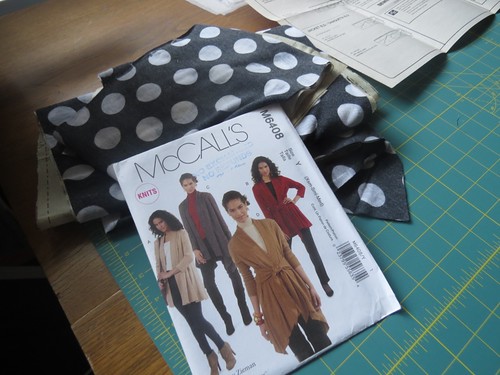
...tidied the sewing room and then messed it up again with a sewing project...

wip: Spotted Cardi
...added a pompom to a nearly finished hat (no photo)...

wip: SpringTastic Socks
...and made some decent progress on a sock.

Pretty good day in my books!  Now lets see if I can get this heel turned before I hit the sack, eh?

Friday, July 24, 2015

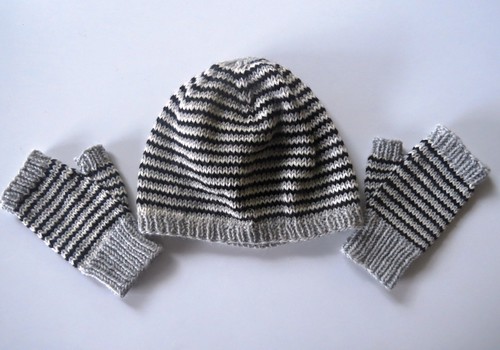
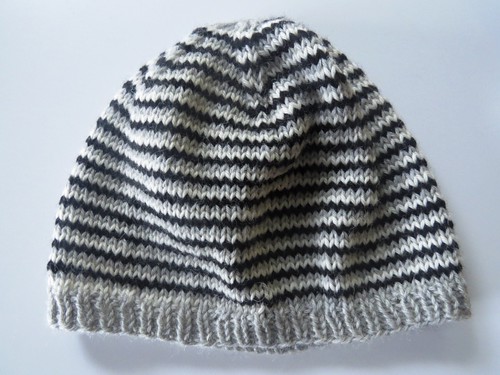
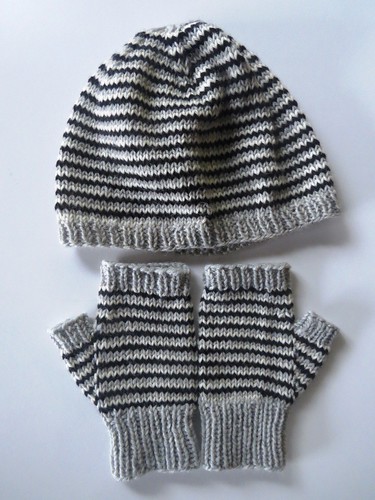
fo: Helix Hat and Mitts Set

Helix Hat and Mitts
You might remember this set, since I mentioned it during my WIP Name and Shame post.  You only saw the hat there, but I'd intended to make a complete set (so I don't count the mitts as a "new" project despite starting them after that post!).

These had to be a knitting priority because I need to get them mailed out early next week.  They're headed off to Manitoba for fundraising event at a family reunion in a couple of weeks.  See, my family has been meeting every other year at my cousin's property in Grand Beach, Manitoba.  And each time, my cousin rents an event tent.  This is getting expensive though, and while family do contribute, it makes more sense to buy our own for family events (weddings, funerals, reunions, etc).  So one of my more clever cousin's suggested doing a fundraising draw during the reunion to raise funds.

Sadly, I can't afford the $1200 ticket (!!!) it'd cost to go back for the weekend, but I wanted to contribute anyways - hence the hat and mitt set.

Plus I *ahem* wanted to try out this pattern.  :) 

Helix Hat and Mitts
I used a pattern my LYS store owner put together for a helix knitting class she held a while back.  No, there's not a bajillion ends to sew in - the stripes are knit continuously and stacked, so there's only the beginning and end to weave in.  It basically involves dividing the knitted tube (because this only works while knitting in the round) into 3 portions (or more! ...if you want to put yourself through that kind of pain) and, using 3 separate colours, knit around constantly pick-up and dropping colours at you reach new ones.

Or something.  I'm not a pattern writer for a reason - go check out this similar pattern if you want more details.

Helix Hat and Mitts
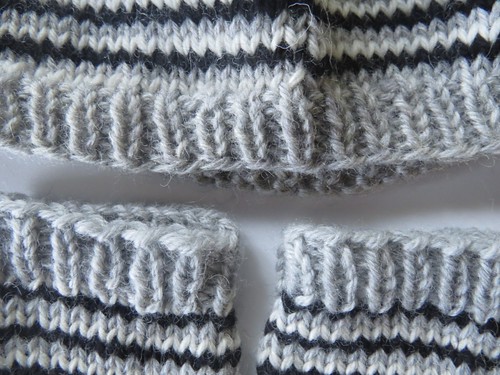
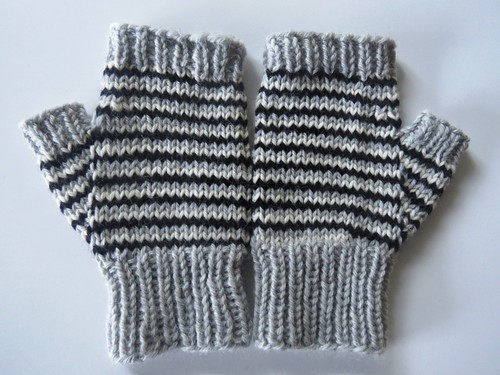
However way you write it, it's a lot of fun to do, if a little annoying since you're always handling 3 different balls of yarn - I was constantly tangled up in yarn.  It's a great stash buster though!  I used two tiny bits of cream and black in this, and I still have enough left over to make another pair of mitts or a hat!  Sadly, I didn't have enough of my left over grey to knit the mitts (although a bit of math later says I might've), but a quick jaunt to the LYS yielded a similar shade of grey.  You can barely tell!  (Right?!  I hope so, anyways.)

Helix Hat and Mitts
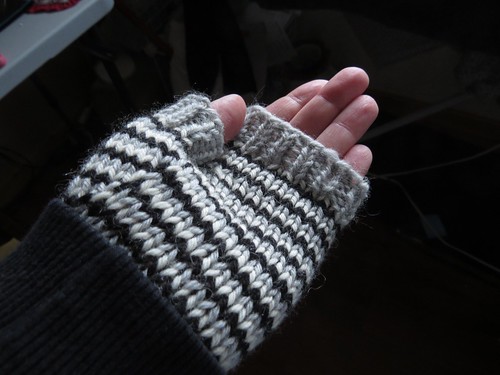
The mitts weren't part of the original pattern, but I just modified the Peakaboo Mitt pattern and added the helix knitting to it.  I love how the thumbs turned out, with a slight jog in the continuous stripes.  They're a good fit too - long enough to lend warmth to fingers and thumbs without interfering with movement.  Nothing drives me more batty than fingerless mitts extending too far over fingers and thumb!

Helix Hat and Mitts
For those curious, here's my Ravelry pages for the Helix Hat and Mitts.

Helix Hat and Mitts
I'm pretty chuffed with them, and I'll be sad to see them leave for Manitoba but I'm glad to be able to contribute to the fundraising - even if I can't deliver them myself.

Also, I really need to finish a pair of fingerless mitts for myself.  Those suckers are useful!